 |
| From For The Love Via Tanya on Pinterest |

Thursday, December 22, 2011
DIY Christmas update
My goal this year was to make almost everything and have everything wrapped early so I could have a cute pile of presents under my cute tree for awhile. It just feels like a waste to have something wrapped for a few hours before it is opened, but it looks like that is what it is coming down to. At least I can say I tried. I am still making a few presents, but for a lot of them I ran out of time and ended up going to the store the other night to buy presents for a couple of my nieces and nephews and some for our annual white elephant gift exchange my family does every year. If only I wasn't full time at work I would have been able to finish all of my presents and then some. Oh well, there is always next year! And now I know I need to start way earlier. It has actually been rather stressful trying to cram everything in to the few hours I have before or after work this week. I am definitely ready for it all to be over so I can enjoy relaxing without feeling guilty. Ok... 2 days left of working my butt off before, during, and after work. I can do it. My presents may not look this cute, but at least they will be wrapped.
Wednesday, December 14, 2011
Dinning room table #2
As promised, I am actually posting pictures of the table we made for one of my best friends. She moved into her first place this summer and I wanted to do something nice as a little house warming gift, so I told her I would build her a coffee table. Which then turned into a dinning room table as well when she told me her budget for a table was 200 bucks! Probably reasonable, but I just couldn't sit and watch her spend that much when I could make her a table for less than half the price. So we made a deal and she paid for supplies and we built the table. Had I know that it was going to take us 6 months to finish (due entirely to laziness and busy weekends) I probably would have kept my mouth shut, because she would have had a table a long time ago. It also turn out a little smaller than we had planned because we changed the style of the legs and forgot to make new measurements. Eeek, we just keep learning with each project. Eventually we will have a successful building story... at least I really hope so.


It looks so much better than the table we built for ourselves, it was really hard to give it up. We are now planning on stripping the stain off of our own table and trying to do this grayish stain that I am falling in love with.
I am kicking myself right now because I forgot to take a picture of her coffee table after it was finished, but this is what it looked like pre sanding and staining.

And after all this building, I think we decided our next car needs to be a truck or SUV because this...

... is getting a little old.
Wednesday, December 7, 2011
My first Christmas tree! (Updated)
Like I said it my last post I have never had my own Christmas tree, and never really planned to have one. My husband and I didn't really liked Christmas trees growing up, and ever since we were dating we had planned to have some other fun alternative. Our first Christmas was a little over a month after we got married and we didn't really have time to think of anything, so we just didn't have anything at all... except for a pile of presents in the corner of our living room. Our second Christmas we were a little more creative and I made stockings and a wreath, which we hung above an old chest and window panel where we piled our presents.

But, it just never did the trick, never felt quite like Christmas so this year we went out and got ourselves a Christmas tree :) (after a lot of begging on my part). And I love it! I have also spent a lot of time over the past couple of weeks making ornaments for the tree, and am proud to say that I made all except two of our ornaments! We have two cats so we didn't want to bother with the glass ones you can buy, so all of mine are cat friendly. Not that I want my cats playing with my tree ornaments, but if they do (like I know they will) they wont make a giant mess and they wont hurt themselves.


I made the star out of a cracker box we had in the recycling bin. Update: Pretty & Cozy has a tutorial on how to make these kinds of stars. They used cardstock but I didn't have any in white, so I just used some cracker boxes and painted them. The first attempt I did was with regular paper, and it turned out horrible, so I suggest something sturdy. There is a templet available on that website that you can print out. Since we don't have ink for our printer, I just took a ruler and measured the templet on my computer screen and then made my own templet. It was a little difficult to figure out and would be way easier to just print, but I made due with the resources I had available.

Covered styrofoam balls with coffee filters.

The garlands are painted styrofoam balls strung together with beads. Inspired by something I found at a holiday faire.
I hand crocheted "doilies" and sewed them onto a heart that I made from brown linen I had. I made lots of doilies in different patterns. This was inspired by these ones at Ikea.


And last years stockings that I made from burlap and wood letters.
 |
| Update: For those who saw earlier, I got a new picture of the whole tree with decorations on it. |
The D.I.Y. Christmas is going great so far, although I think I am a little behind.
I'm linking this post up to my first link party! Check out some other bloggers and their DIY Christmas decor!

Monday, November 28, 2011
Just a few improvements
Alex and I moved into our new home at the end of January, so I really have absolutely no excuse for this:


Yep, A whole lot of nothing, for nearly a year (oh except the lovely cat dishes, so attractive right?). I wanted to put a little entry way table there but when I look at any decor or furniture I can not find it in me to justify spending triple the amount I can pay to make my own. And make it the way I want it. Soo, we've spent several months being lazy while this was awaiting us in the garage...


So. much. better. And yes, we made this lovely piece (along with a dinning room table for a friend that will be posted soon, hopefully). We bought pine and stained it to give it an old barn wood look. It really looks much better in person. I'm not even going to pretend I'm an awesome photographer, I took these with my iphone.
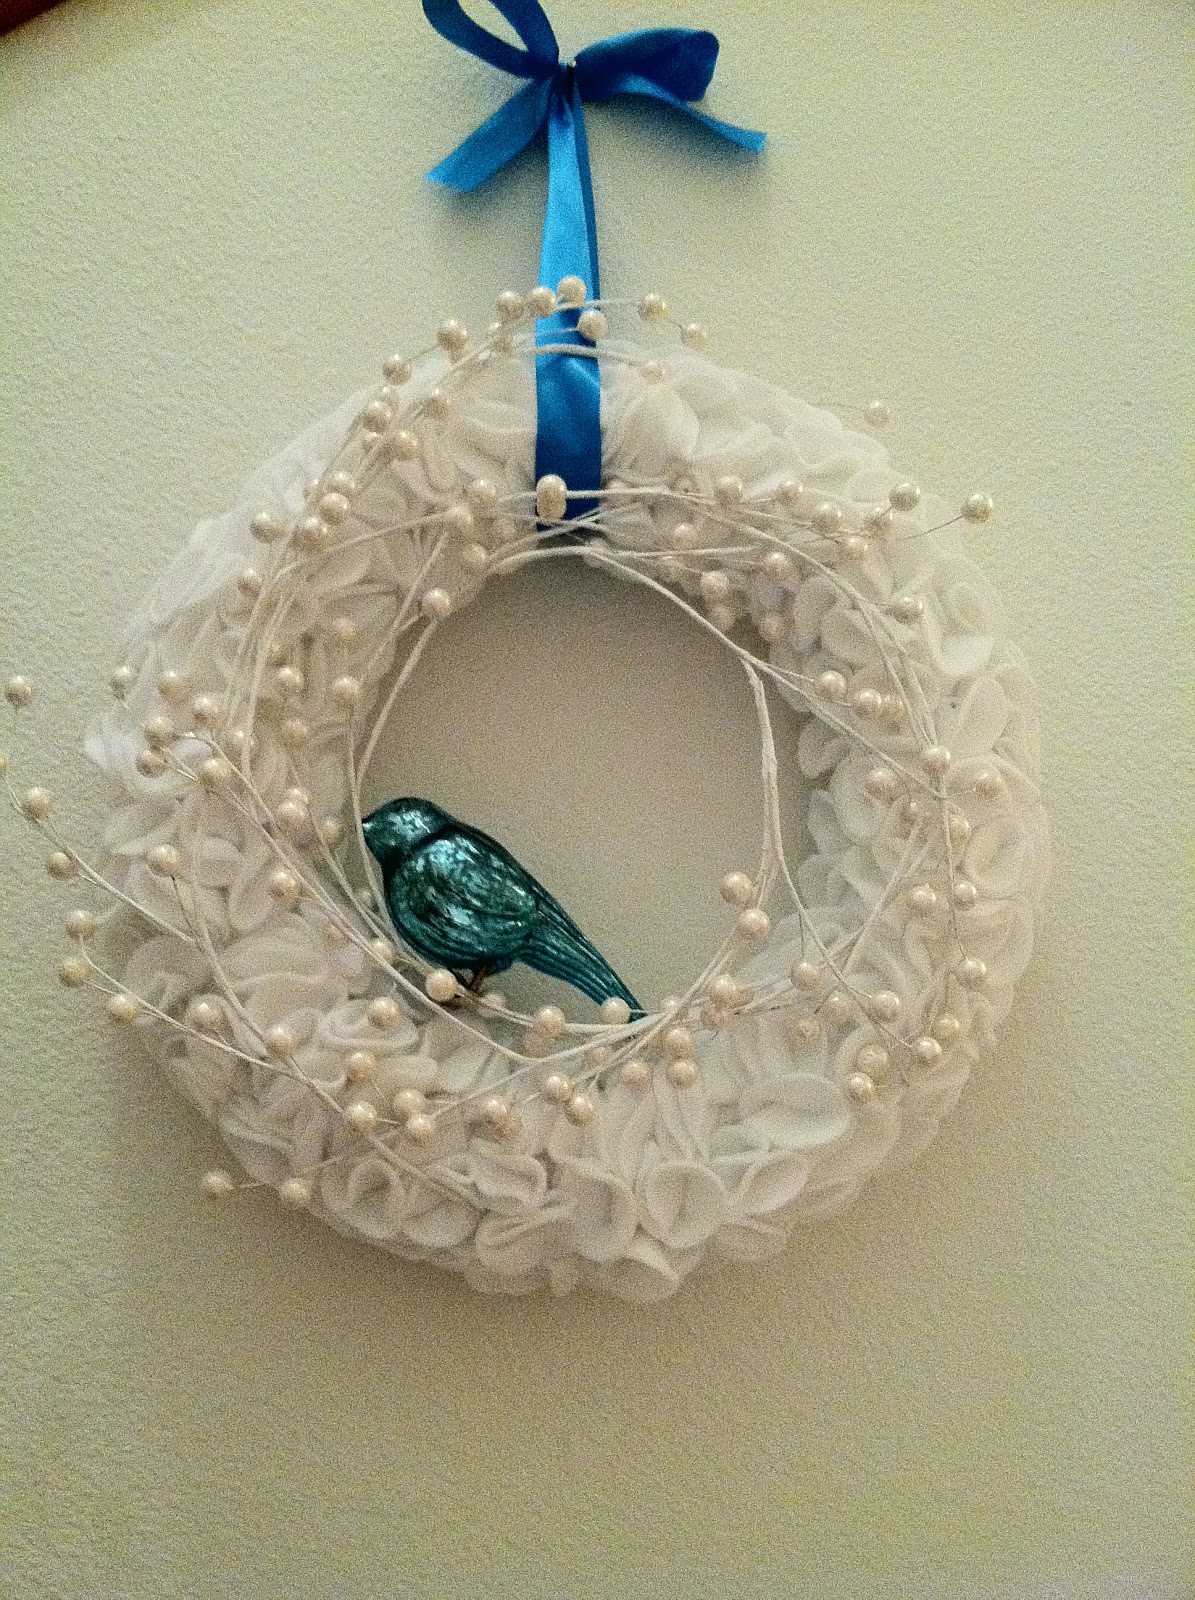
This also gave me a lovely place to hang my wreath that I made last year. I was inspired by one I found on design sponge. You can check it out for a tutorial, but just to warn you it took FOR.EV.ER. I added some of the berry things (technical name?) I got for super cheap at Joann's and this year I added the little birdie.

We have a few more Christmas decorations up, which I am temped to show, but I think I am going to wait until we have everything up. What I will say is that this is my very first year with a Christmas tree of my own, even though this is our third Christmas together. My husband and I have never really been fans of Christmas trees (I know, I'm a horrible person), but this year I kind of got the tree bug and I had to have one. I was literally jumping up and down when we made plans with some of our good friends to go get some wild trees! Ahh! I'm excited just thinking about it now. Anyways, we got our tree over the weekend, but it isn't totally decorated yet. I'm attempting all homemade decor and presents this year (aside from the Christmas lights). Here is what our Christmas looked like last year, so it can only get better from here on out, right?

The chest was actually completely covered in presents but this is after we opened all of ours up. I think this year will be a vast improvement. Ahh, I love Christmas.
Have a great week everyone! Thanks for stopping by.
Thursday, November 24, 2011
Just a couple things I'm thankful for...
Today I just want to say how thankful I am for my friends, all of them. There are a couple friends in particular that I know, in some shape or form, will always be a part of my life. There have been years where we haven't talked at all, years that we have fought, years that I thought we would never speak again, and then years where I remember that my life would be so different had I never met them. Sometimes we live in different cities, states, and even countries, but somehow our paths have always found a way to meet up.


This is true friendship. Not one that is fake, but one where life pulls you apart and pushes you together and even in the times were you are angry with each other, you couldn't imagine your life without them.


I just want to say thank you for sticking with me through my personal battles and constant ebbs and flows of life, and helping me grow and become a better person along the way. Both of you mean a lot to me, regardless of what we have been through, and I'm so grateful I met each of you so many years ago.
Monday, November 21, 2011
My first yarn wreath and a flower tutorial.
Over the last few months I have sort of taken a little crafting/blogging hiatus. At some point awhile back I went from working 20hrs to 30hrs a week and then this summer went to full time. Unfortunately this hasn't left me a ton of time to do all the things that I love. Since we've been back from Hawaii something just kind of clicked and I realized that what is important to me is for both my husband and I to be doing the things we enjoy, and not just the things that pay the bills. It just isn't fulfilling to wake up every morning and wish you could spend the day doing something that you actually enjoy. So with that said, in January I will be going back to school and soon after going back to part time. I'm so excited to be taking a step towards the future we want. Also since being back we have kind of gone a little crazy on overdue projects. Ok, let's be honest I have gone a little crazy and he has just given in to my whims.
So to kick off the soon to be Christmas season, here is the yarn wreath I made yesterday:


I know that the yarn thing has been done several times so I'm not going to bother with a tutorial, but here is one by Take Heart if anyone needs to see how it is done. But it was super super easy.
Here is another fabric flower that I made with different fabric which shows you a little better what these guys look like in person.

There are tons and tons of fabric flowers out there and I'm sure someone somewhere has a tutorial for these, but I personally couldn't find one so I will show you how I made mine.
Step 1: Cut a strip of fabric, tapering it so one end is wider than the other. It doesn't have to be much wider, just about a quarter to half an inch.


Step 2: Fold fabric in half (hot dog style) and cut slits in the fabric. This should be self explanatory and you probably don't need me to tell you this, but I made the silly mistake of accidentally cutting all the way through the fabric a couple times and had to start over, so beware of that.

 Step 3: Fold in half and do a simple stitch through the solid side of the fabric (aka: the non-loopy side)

Step 4: As you are sewing pull the thread through the fabric so it starts to gather. Continue to the end of the fabric. As you go the fabric will spin into a flower shape.


Step 5: (No photo) The fabric should be all gathered into a flower shape now, you can adjust the layers as you like and then sew through all of the layers of fabric until it feels good and secure. Add buttons or whatever embellishment you like.
Well hopefully that was helpful! Hope everyone has a great week and a wonderful Thanksgiving!
So to kick off the soon to be Christmas season, here is the yarn wreath I made yesterday:


I know that the yarn thing has been done several times so I'm not going to bother with a tutorial, but here is one by Take Heart if anyone needs to see how it is done. But it was super super easy.
Here is another fabric flower that I made with different fabric which shows you a little better what these guys look like in person.

There are tons and tons of fabric flowers out there and I'm sure someone somewhere has a tutorial for these, but I personally couldn't find one so I will show you how I made mine.
Step 1: Cut a strip of fabric, tapering it so one end is wider than the other. It doesn't have to be much wider, just about a quarter to half an inch.


Step 2: Fold fabric in half (hot dog style) and cut slits in the fabric. This should be self explanatory and you probably don't need me to tell you this, but I made the silly mistake of accidentally cutting all the way through the fabric a couple times and had to start over, so beware of that.


Step 4: As you are sewing pull the thread through the fabric so it starts to gather. Continue to the end of the fabric. As you go the fabric will spin into a flower shape.


Step 5: (No photo) The fabric should be all gathered into a flower shape now, you can adjust the layers as you like and then sew through all of the layers of fabric until it feels good and secure. Add buttons or whatever embellishment you like.
Well hopefully that was helpful! Hope everyone has a great week and a wonderful Thanksgiving!
Thursday, November 10, 2011
Amazing Artist
While Alex and I were in Hawaii we went into a few art galleries. They have many galleries there with some very talented artists, and if you are ever there you should just walk in some of them. Amazing! Anyways, there was this one particular surrealist artist that we were very impressed with, his name is Vladimir Kush. This is honestly one of the most talented painters I have ever seen and I just had to share, here are just a few of his pieces. These are not necessarily my favorites just some that I really liked. He has so many paintings I couldn't decide which ones to share.


You can visit his official website at http://vladimirkush.com/ but I also did a google image search and found a ton of his work. These images don't capture even half of the amazing detail. Hope you enjoy as much as we did!


 |
| Not sure if you can tell because of the low quality of the image but on the hill where it is raining there are people doing a rain dance. |


You can visit his official website at http://vladimirkush.com/ but I also did a google image search and found a ton of his work. These images don't capture even half of the amazing detail. Hope you enjoy as much as we did!
Wednesday, November 2, 2011
Two years ago today...
I woke up and had my hair and make up done...

I put on my white dress...

Saw my soon to be husband for the first time...


We said our vows...

...and skipped down the aisle as husband and wife.

And here we are two years later, celebrating our anniversary from the beautiful island of Maui. Four years ago when we first met I never would have dreamed that we would be where we are today. And I am excited for the years to come. Sometimes I forget what we went through to be together now, the months of waiting and just wishing that I could hold his hand or tell him how much I liked him (not that he couldn't tell). The horrible flirting. The giggling and uncontrollable smile that I couldn't help but have every time I got to talk to him. I am so blessed to be his wife. Even when he drives me crazy, or when I nag him to death (sadly I can't deny that I nag sometimes) I couldn't be happier, and I don't regret a day of our life.
To the love of my life, thank you for always (for the most part ;) ) putting me before yourself and loving me regardless of my faults. You help me be a better person everyday!

Subscribe to:
Posts (Atom)